Create a gallery
You can create a gallery in two ways: from the New gallery form, or by dropping photos straight onto the Galleries page. Either way you can change the title, template and settings later.
Create a gallery from the form
- Open Galleries and select New gallery.
- Enter a Gallery title. This is the only required field.
- Optionally set a Shoot date.
- Choose a Template. Select More to see all of them. Your defaults for the template are applied automatically. See Choose a template.
-
Select Create. The gallery opens in the editor, ready for photos.
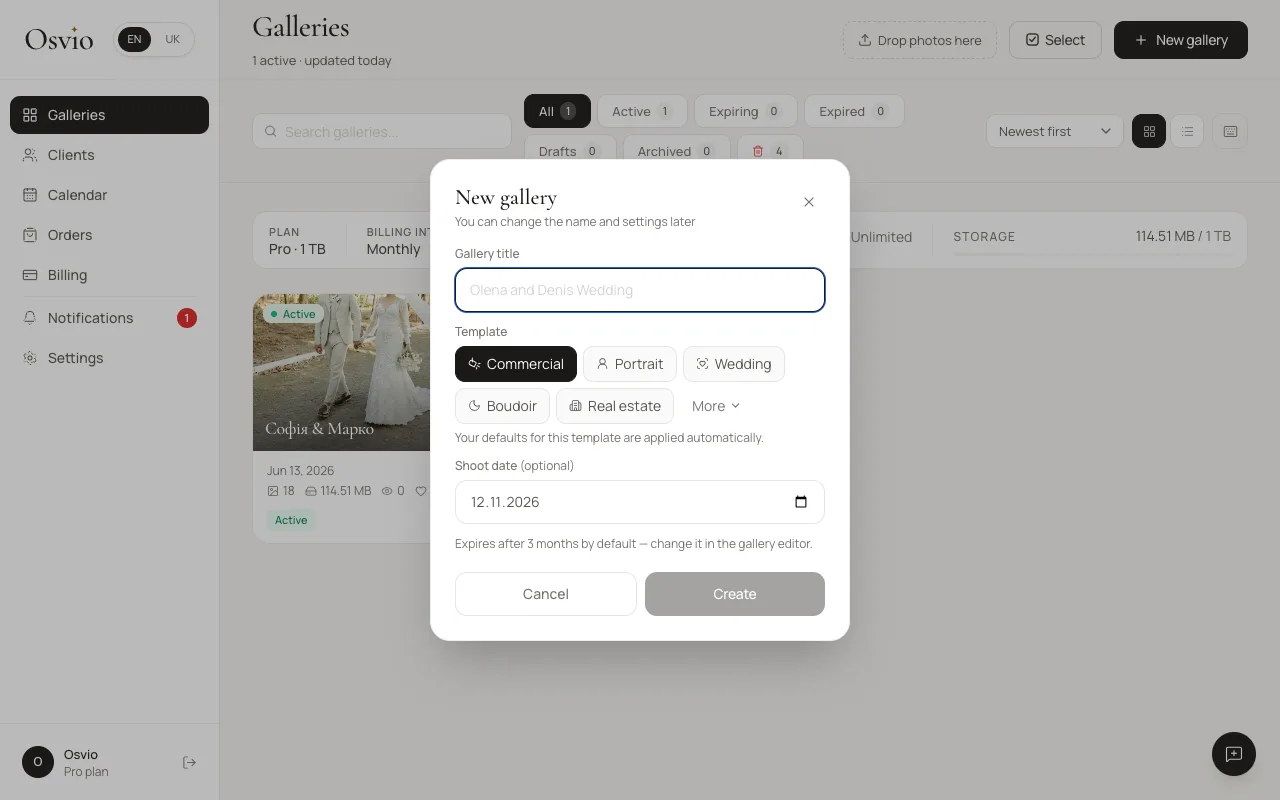
The form also tells you how long the gallery will stay available. See Set when a gallery expires.
Create a gallery by dropping photos
Drag photos, videos or a ZIP of them onto the Galleries page. The page says "Drop to create a gallery" and creates a new gallery with your files in it.
- Drop onto a template to start with that template. Anywhere else uses your default template.
- A ZIP can contain photos and videos. If a ZIP can't be read, is password-protected or contains nothing Osvio supports, you'll see a message explaining which.
Change the title and the link
In the editor, select Edit title, or click the headline directly in the template.
- Title is what clients see.
- URL (unique, latin characters) is the last part of the gallery link, which looks like
https://your-subdomain.osvio.photos/g/your-url. Your subdomain is set when you sign up. Each gallery needs its own URL, and Osvio tells you if the one you chose is already used.
Limits
How many galleries can be active at once depends on your plan: 3 on Free, 20 on Basic, 100 on Standard, and unlimited on Pro. If you reach the limit, creating another gallery is blocked with "Your current plan does not allow more active galleries." Archiving a gallery stops it counting as active. See Archive and restore a gallery.