Set up your profile
Your profile holds your photo, your logo, your contact details and, if you want one, a public photographer page. Most of it is optional, so you can fill it in over time. The logo is worth adding early, because it can appear at the top of your client galleries.
Open your profile
Select your name at the bottom of the sidebar. The Profile page has three tabs: Profile, Contacts and Account. Select Save when you've made changes; you'll see "Changes saved". Use View public page to see your public page.
The Profile tab
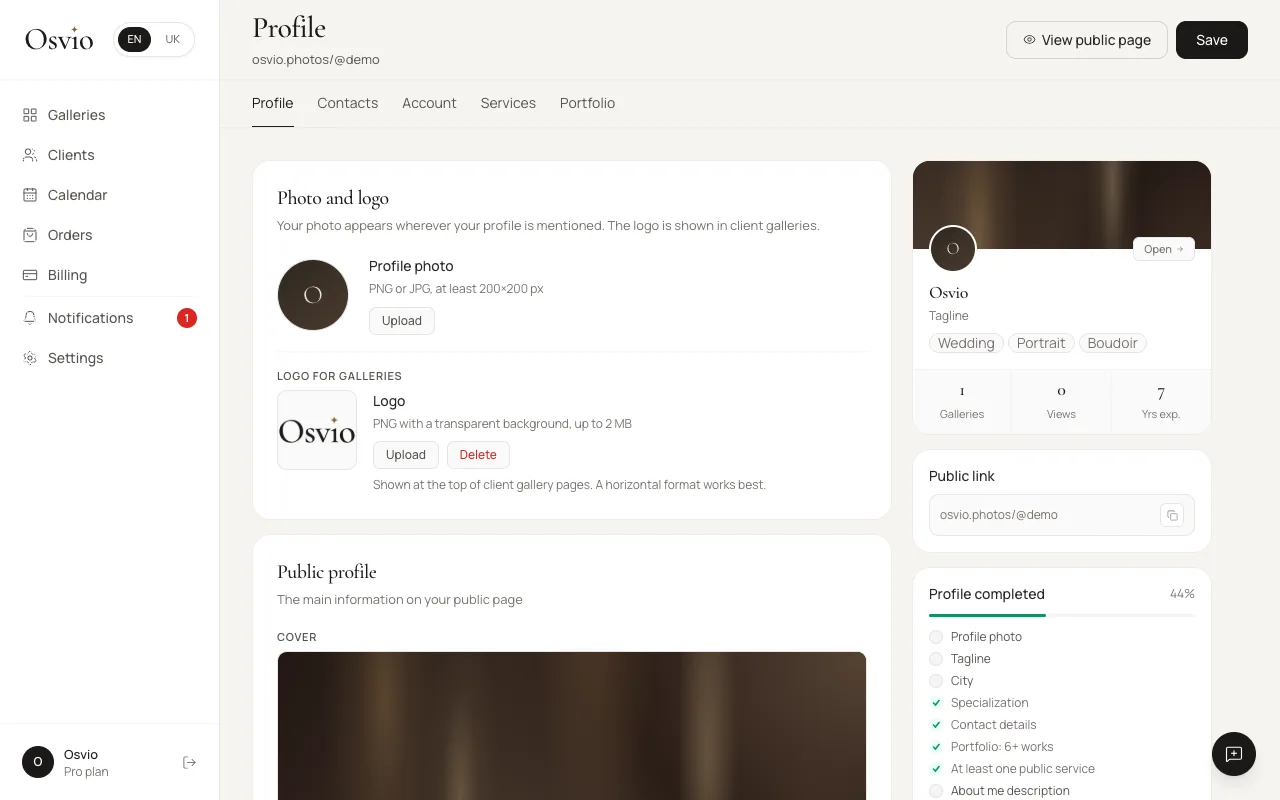
Photo and logo
- Profile photo appears wherever your profile is mentioned. Use a PNG or JPG that is at least 200×200 px.
- Logo for galleries is shown at the top of your client gallery pages. Use a PNG with a transparent background, up to 2 MB. A horizontal format works best.
Public profile
- Cover is the image shown in the preview when you share your profile link. Use a JPG, PNG or WebP that is at least 1200×630 px and up to 10 MB.
- Display name and Tagline, a short line about who you are and where you shoot.
- About me, up to 400 characters.
- Profile URL is your public address,
osvio.photos/@yourusername. It can contain only Latin letters, numbers and hyphens.
Specialization. Choose up to 5 genres. They appear as tags on your public page.
Accent colour. Sets the colour of the main "Request a date" button and of selected items on your public page.
The Contacts tab
- Contact information: Email for clients, Phone, City, Country and Website. These are shown on your public page.
- Where I shoot: the cities, regions or countries you travel to for shoots.
- Studio address: optional. It appears on your page as "Studio", without a map.
- Languages: the languages you speak with clients.
- Social networks: links to your Instagram, Facebook, Telegram and TikTok. They appear as icons on your public page.
Publish your public page (optional)
Your public page is separate from your client galleries. It shows your profile, specializations and contact details, and client galleries never appear on it.
- On the Profile tab, enter a Profile URL. Without one, the page has no address and can't be made public.
- Under Visibility, turn on Public photographer page. Anyone with the link can then open it.
- Select Save, then View public page to check how it looks.
Your logo in client galleries
Having a logo on your profile doesn't automatically show it in every gallery. Each gallery has a Show logo setting under Branding in its settings. See Gallery settings.
Account tab
Your login details, two-factor authentication, notification preferences and subscription are on the Account tab. See Account & settings.